No items found.
Free Webinar · May 7 · How to Get (and Keep) More Patients as a Practitioner →
Save Your SpotSetting up your clinic's web portal and branded app through Noterro allows seamless patient interaction and management. Here's how you can effectively configure and manage these settings.
Your Noterro web portal will be hosted on a subdomain of Noterro. Choose a subdomain that reflects your clinic's name, e.g., yourclinicname.noterro.com. This unique URL will serve as your clinic's online identity.
If you are using Google Analytics for tracking, particularly GA4, please make sure that you input the correct tracking code in the analytics section of your portal settings.
You can select the features you want to enable in your web portal. These include:
Please ensure that the Help Section can help patients needing guidance while navigating the portal.
The information section allows you to customize:
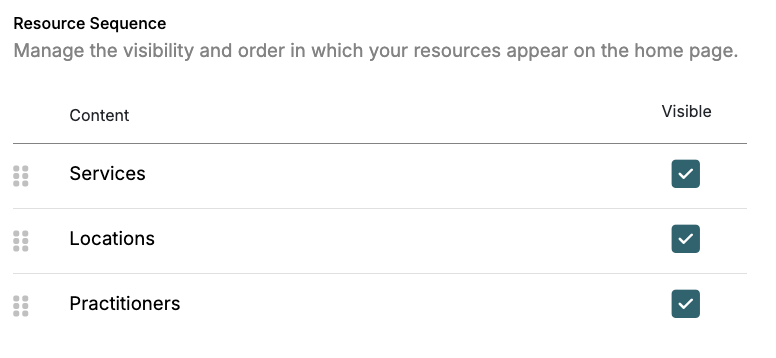
Arrange the order of resources like services, locations, and practitioners based on booking preference. You can choose card or list view for service display.
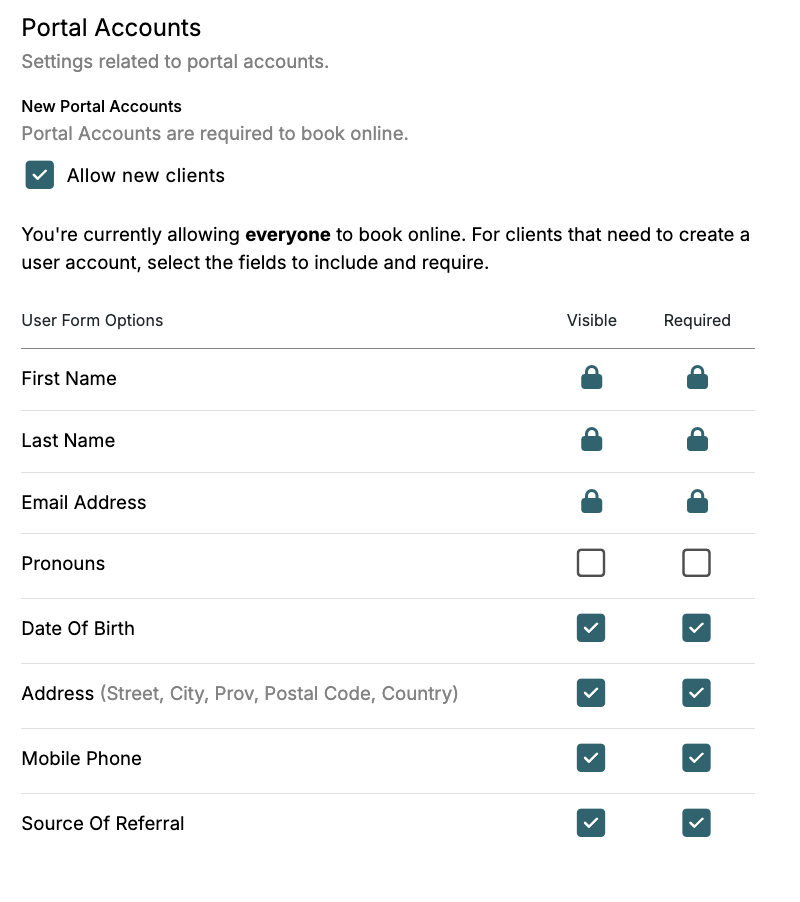
Patients must create an account to access online booking or portal features. First Name, Last Name, and Email Address are mandatory fields. Other fields like pronoun, date of birth, and mobile phone are configurable.
Set up a booking agreement policy to inform patients about cancellation or payment policies—these need agreement upon initial booking.
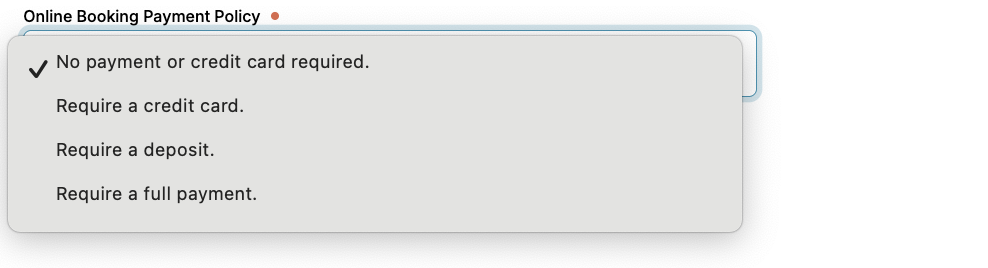
If connected with Square or Shift4 (formerly Worldline/Bambora), configure the payment policy; for example, it may require no payment upfront, credit card, or full payment.
Manage visibility and online booking settings for locations, practitioners, and services. Each should have a distinct checkmark to indicate availability for online booking.
Each resource page has a public link at the top right corner of your portal settings. Use these links to direct your website visitors to specific services, practitioners, or locations. To view your portal's public appearance, click on Open Portal.
By configuring these settings, your clinic’s web portal and app can offer your patients a seamless, professional experience. Contact Noterro support for further assistance.
Setting up your clinic's web portal and branded app through Noterro allows seamless patient interaction and management. Here's how you can effectively configure and manage these settings.
Your Noterro web portal will be hosted on a subdomain of Noterro. Choose a subdomain that reflects your clinic's name, e.g., yourclinicname.noterro.com. This unique URL will serve as your clinic's online identity.
If you are using Google Analytics for tracking, particularly GA4, please make sure that you input the correct tracking code in the analytics section of your portal settings.
You can select the features you want to enable in your web portal. These include:
Please ensure that the Help Section can help patients needing guidance while navigating the portal.
The information section allows you to customize:
Arrange the order of resources like services, locations, and practitioners based on booking preference. You can choose card or list view for service display.
Patients must create an account to access online booking or portal features. First Name, Last Name, and Email Address are mandatory fields. Other fields like pronoun, date of birth, and mobile phone are configurable.
Set up a booking agreement policy to inform patients about cancellation or payment policies—these need agreement upon initial booking.
If connected with Square or Shift4 (formerly Worldline/Bambora), configure the payment policy; for example, it may require no payment upfront, credit card, or full payment.
Manage visibility and online booking settings for locations, practitioners, and services. Each should have a distinct checkmark to indicate availability for online booking.
Each resource page has a public link at the top right corner of your portal settings. Use these links to direct your website visitors to specific services, practitioners, or locations. To view your portal's public appearance, click on Open Portal.
By configuring these settings, your clinic’s web portal and app can offer your patients a seamless, professional experience. Contact Noterro support for further assistance.


.webp)
No credit card required. Available 1-on-1 support.
.webp)
No credit card required. Available 1-on-1 support.
.webp)
.webp)